Monday, May 20, 2013

Ball joints

Next up are the front upper and lower ball joints for the hub carrier. The uppers I am replacing with sealed units that are 'greased for life' - no need to fiddle with them. Lowers I am building up from parts kit - it's all pretty self explanatory from the kit plus Haynes manual. Don't be surprised by the total inconsistency between the number of shims required from one to another. One side only needed a couple - the other I think I ended up with 10 different thicknesses.

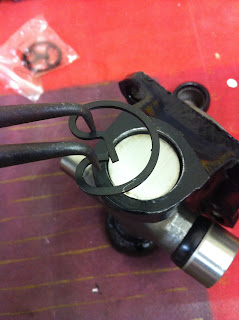
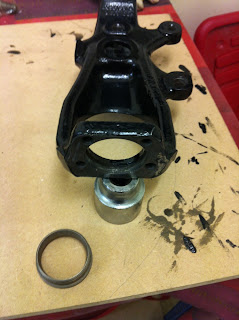
Firstly the spigot ring thing (forgotten the techical term for it) needs to be inserted and seated down. The castings are not consistent in their depth so one looks better positioned than the other. Apparently this is common.


Seated it has a groove machine in as a grease channel. Not all have these in again - depends on manufacturing batch. I love the consistency.


You just have to keep trying the fit with different shims until the right amount of torque / pressure to move the joint is achieved. I tried to measure the end float to calculate this but inthe end the trial and error method is just as good - and I feel I know much more about the joint as a result.

These bolts have not been torqued down to final value yet. I will make a nail varnish reference mark on bolt and carrier for simple visual 'has it been done' and 'has it moved' test in the future.

Saturday, May 11, 2013

Front wishbones

For the wishbones I decided to use modern polythene type bushes and not the original type Jaguar ones. After the battle I had getting the Jag ones out I couldn't face the same getting new ones in plus the polythene ones should wear better.
There are differing schools of belief on this and whether the ride is better or not - they come with different ratings - effectively the density of the plastic. I have gone for medium ones.

Using graphite grease is apparently the key to putting these in. Stinky stuff and gets everywhere but both upper and lowers are all put together in a few minutes.


Sunday, May 5, 2013

Rebuilding things

A bit of a break with work and things but now ready to start rebuilding parts. The plan is to get as much put back together and then put everything away so I can resurface and paint the garage floor. The outside temperature needs to be 15 degrees plus hence doing things in this order whilst waiting for summer to come around.

So to the universal joints. I am fitting ones that are higher rated than standard jaguar replacements as those old Jaguar engines didn't produce the type of torque that my intended powerplant does. (Upwards of 420 lb ft)

Take one drive shaft, one coupling for inner joint to brake disk / differential union and one UJ and start assembling. These go together alot easier than they came apart.


I put the UJs in the freezer for 15 minutes before hand to help with fitment. Can't say whether it made a difference or not. The key thing is not to let the outer race / cap drop off else you'll have needle bearings all over the floor... and when it's not painted they get covered with concrete dust and need recleaning and greasing. Ask me how I know this!!!

At 5 minutes a go with plenty of alignment checking one drive shaft complete after 40 minutes or so.